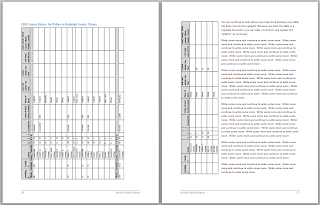
To construct this table, you need to open a new document and add the table. After the table is finished, we're going to turn the two pieces into graphics, and then rotate the graphics so that they fit on a portrait page. Here's what the final pages with the table graphics inserted will look like. Notice that you can use wrap options to type text on the right-hand page.
- Open a new Word document.
- Reset all margins to .5 inches.
Open the Page Setup dialog.
--Word 2003: Select File, and then Page Setup.
--Word 2007/2010: Select the Page Layout tab and locate the Page Setup group. Click the small arrow in the lower right of the group.
The Page Setup dialog appears. - Enter .5 for top, bottom, right, and left.
- Click the Landscape button.
- Click OK.
- Add the table title.
--Type this text: 1850 Census Entries for McKee in Randolph County, Illinois--Apply a Heading 3 style, and then press the Enter key. - Display the Insert Table dialog.
--Word 2003: From the menu, select Table, Insert, Table.
--Word 2007/2010: On the Insert tab, click Tables. - In Number of columns, enter 13.
- In Number of rows, enter 10.
- Under AutoFit behavior, click AutoFit to contents.
- Click OK. The table appears in your document.
- Save the document under a name you will recognize.
- In the first row, type the 1850 census column titles.
--Click in the first cell, and type the column title.
--Press the Tab key to move forward to the next cell, and add text.
--Press Shift + Tab to move backward to the previous cell.
Notice that in the table I created I abbreviated Age, Sex, and Color. I've included all of the columns because while the census entries I'm looking at do not have entries in all columns that may not be the case for entries you are looking at. - In the second row, type the location description, and then merge the cells in row two.
To merge, select the entire row. Move your cursor to the left of row two. Your cursor changes from an I beam to an arrow. Point the arrow at row two and click once to select the entire row. Word highlights the row. Right-click in the row to display the popup menu, and then select Merge. Word removes all vertical table borders except the end borders. - Add a gray fill to rows one and two.
To fill, select rows one and two. Move your cursor to the left of row one. Your cursor changes from an I beam to an arrow. Point the arrow at row one and click once. Hold down the mouse button and drag your cursor down to the second row. Word highlights rows one and two. Right-click in the highlighted rows to display the popup menu, and then select Borders and Shading. The Borders and Shading dialog appears. Select the Shading tab. In the Fill drop-down, select one of the shades of gray. You add a bit of color to a heading (gray if you are printing to paper) so that your reader has a visual break that they can use to identify titles and locations. - In the third row, start adding census data. You can add the data I show in the sample or your own data.
- When you have a new location (township), add the location, merge the fields, and fill with gray to provide a visual break for your reader.
- Continue adding entries. When you table breaks to page two, just let it break. After you have two pages of entries, we have two problems to fix: 1) row splitting across page break; 2) no titles above page 2 columns.
- To stop a row from splitting across a page break, complete these steps.
--Select the entire table. Click once anywhere in the table, and then right-click to display a popup menu. Click Select, and then Table. Word highlights the entire table.
--Display Table Properties. Right-click anywhere in the highlighted table to display the popup menu, and then select Table Properties. Click the Row tab. In Options, remove the check mark from Allow row to break across pages. Depending on what you've done, you might see the check box filled in with color. Click it twice to remove all marks. Click OK to save the change. The table will allow only entire rows and will not split a row across a page break. Click anywhere outside of the table to remove the highlight. - To add a title row to page two, repeat header rows.
--On page one, select row one (the title row) of the table.
--Word 2003: From the menu, select Table, Repeat Header Row.
--Word 2007/2010: On the Layout tab, click the Repeat Header Row button in the Data group.
Regardless of how many pages of census entries you enter, the heading row will appear at the top of each page.

Thank you! I learned several features that I regularly need to use!
ReplyDeleteI'm glad you're finding this helpful. I'm several steps ahead in the posts but I've gotten thru the basics. Next, we'll be looking at the stuff that makes table artistic. So stick with me and you'll be a table expert.
ReplyDelete